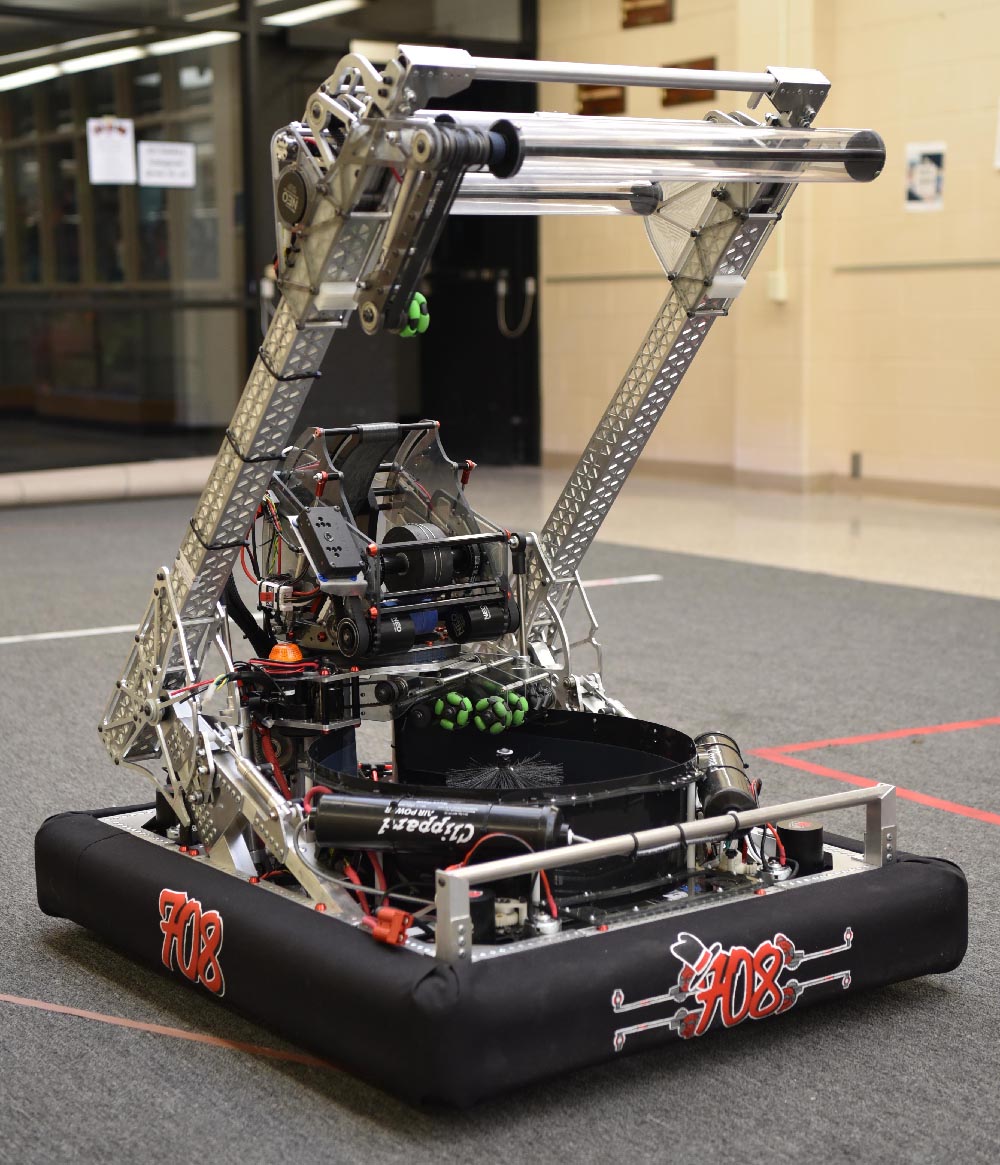
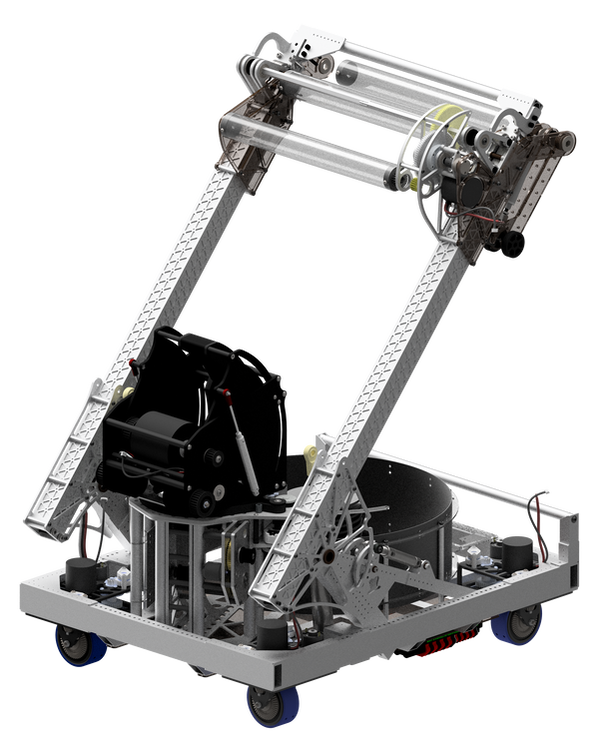
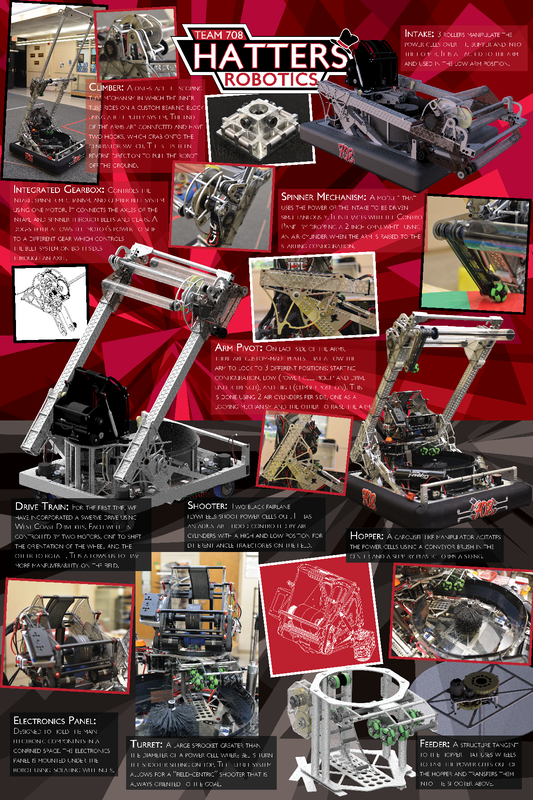
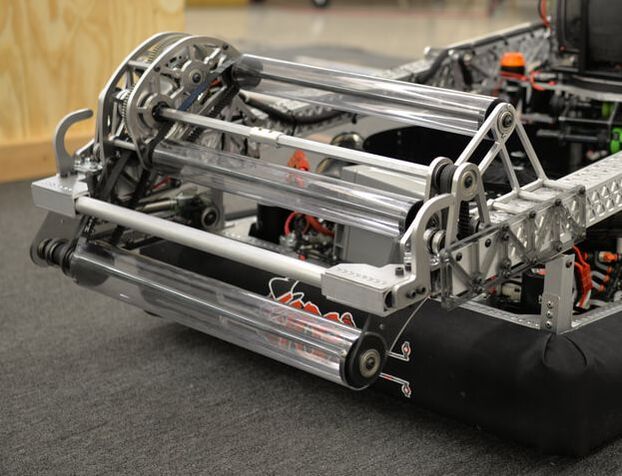
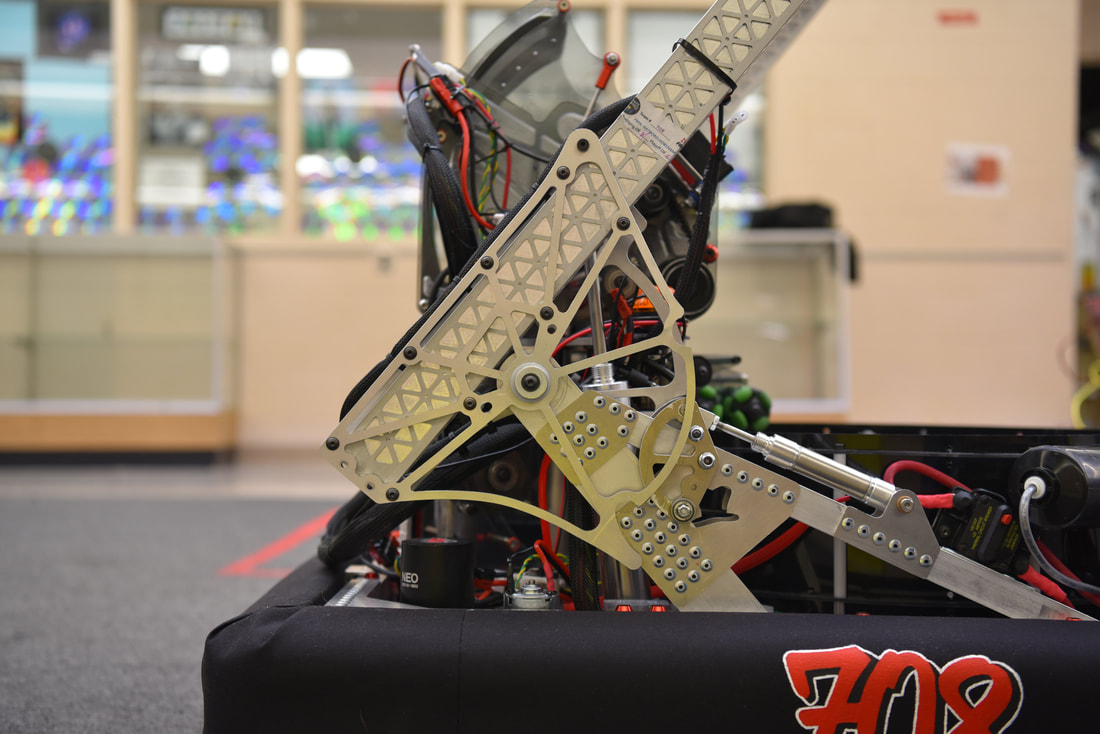
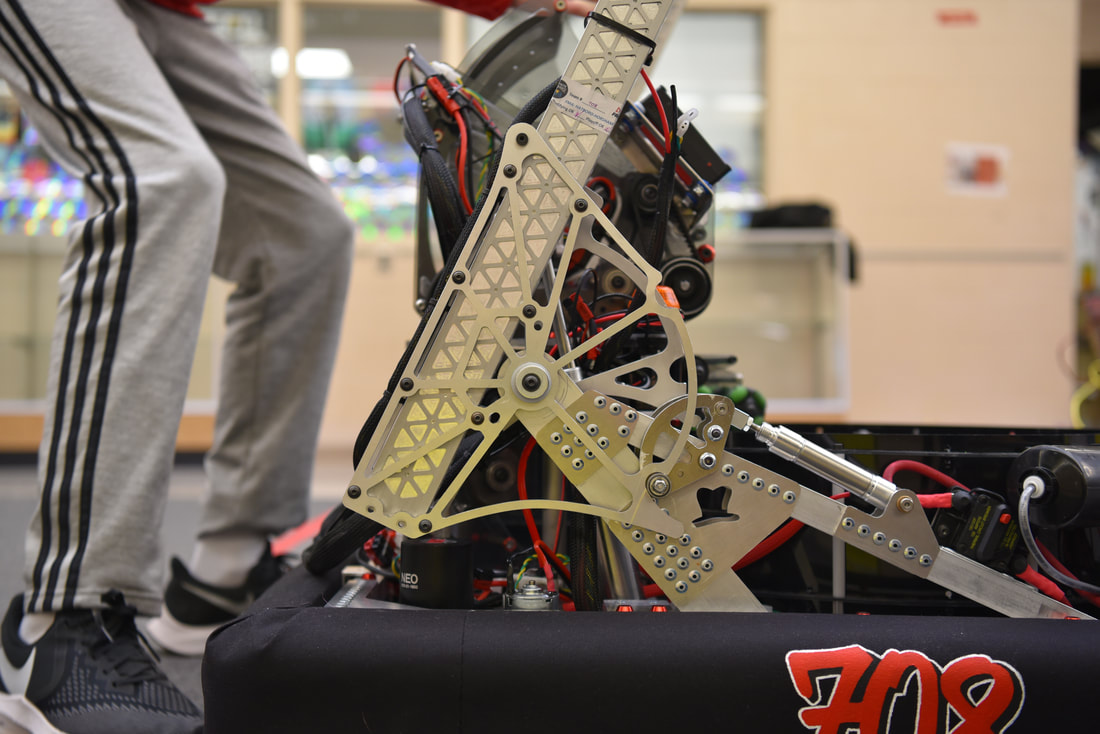
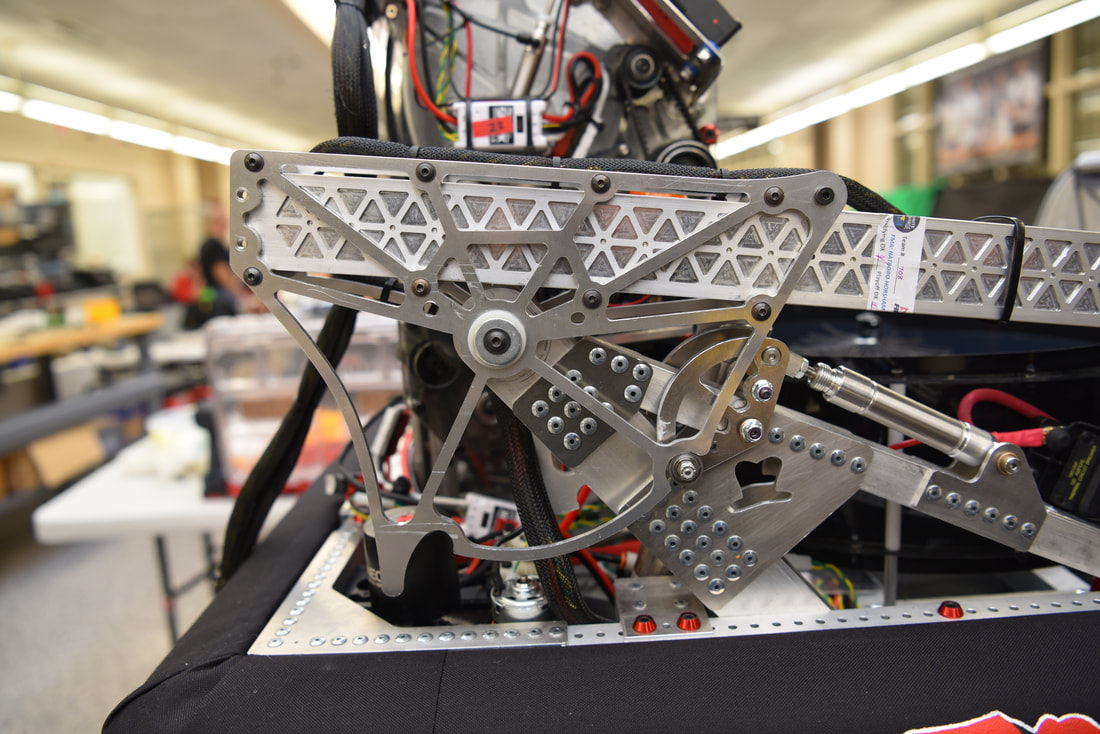
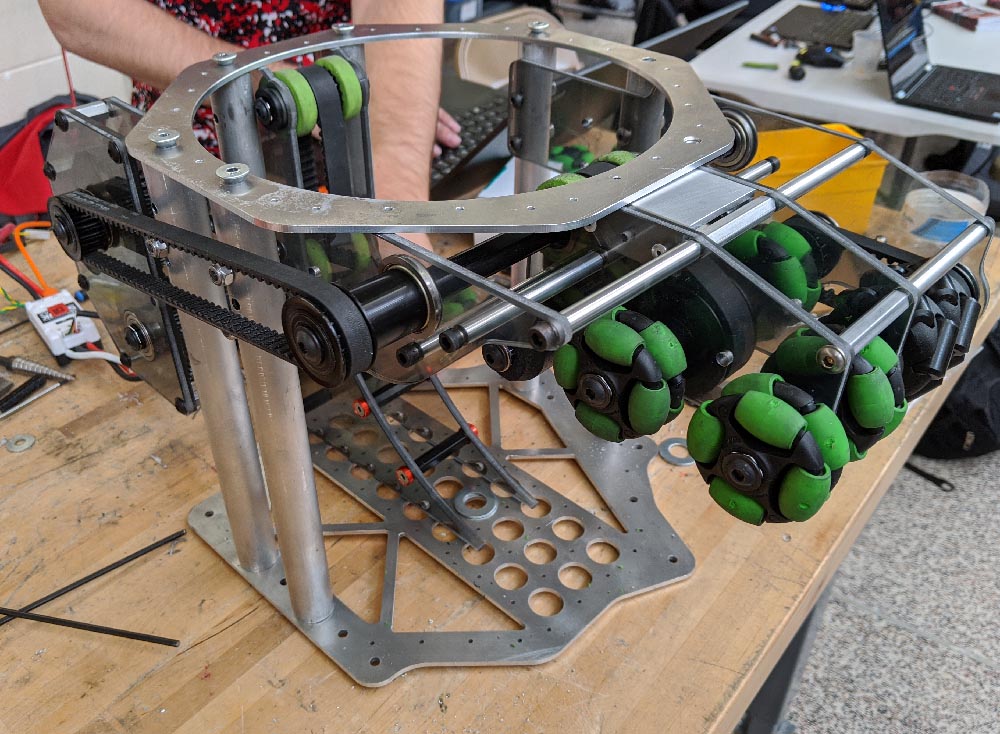
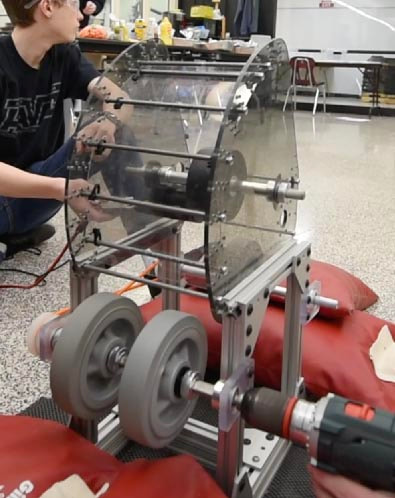
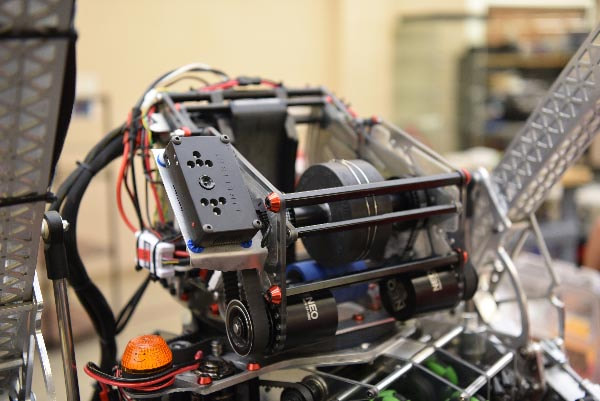
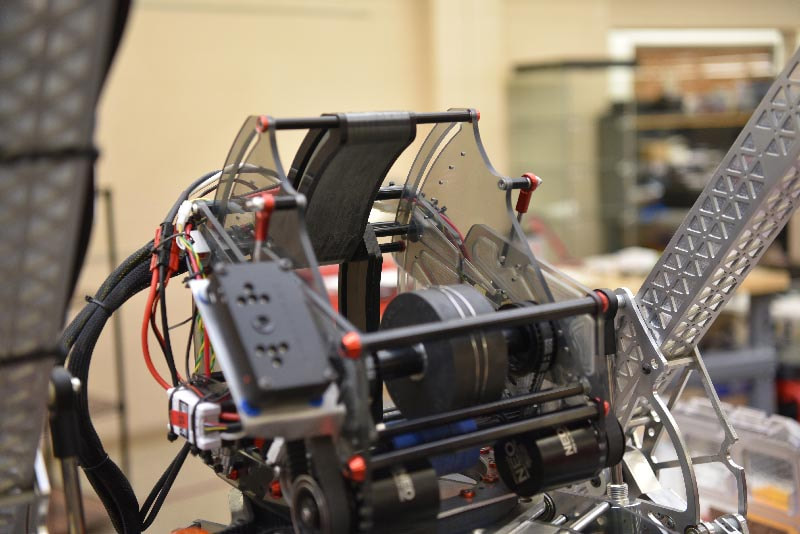
2020 RobotTeam 708’s 2020 robot is designed to be able to efficiently and effectively perform almost every task on the Infinite Recharge field. Our strategy this year was to use our agile swerve drive combined with our large and dominating intake to start the match off by scoring 8 balls. After auto ends we speed to the other side of the field under the trench and quickly gather more balls Then, we race back, avoiding our teammates and the opposing alliance, to rapidly score 5 balls into the high goal. As our robot is intaking, the free-flowing hopper is constantly preparing the balls to be hurled out of our turreting shooter that locks onto its target using its limelight. After we have scored the 29 balls, we can spin the color wheel which mechanism is powered by the same gearbox that we use for the intake and climber. During the last 30 seconds, we raise our arms and extend the climber to reach up and grab onto the bar. Lastly, we climb off the ground to finish the match with our teammates.
|
Season Summary
Hatboro-horshamRecord: 6-8-0
Rank: 14 (out of 36) Quarterfinalist Creativity Award |
Season cancelled...
|
Weekly Build Season Videos
CAD Download
|
Robot Poster
| ||||||||||||
Strategy
- At the beginning of the build season, we made many important foundational decisions. We discussed extensively how we wanted to play the game, what we wanted our robot to look like, and what type of drive train we wanted during the first few days following kickoff.
- During the first weekend, we read through the game manual, talked about ways to score, and broke down how we wanted our robot to play the game. We were able to base the look and functions of our robot off our conversations about what we wanted to accomplish.
- We separated various objectives into three categories: needs, wants, and stretches. Needs consisted of things we determined our robot must include, like the ability to shoot in the high port, the ability to climb, and the ability to score in autonomous. Wants were goals we though would be important to succeeding, but not a necessity. These included an eight-ball autonomous and a turreted shooter. Finally, we had stretches. These objectives would be very cool to have, but would require more space, weight, or complexity than it would be worth to implement. Lateral generator switch movement, a buddy climb, and a ten-ball auto were our stretches.
- We had to make many important decisions about our robot during the early stages of the season such as: high or trench robot, tank or swerve drive, etc. These topics were discussed in length through examining the pros and cons of each issue.
- This year, we determined we wanted a high-scoring robot with fast cycle times. We settled on a trench bot with a swerve drive, a drive drain we have never attempted at a competition robot before. Next, we moved into planning the general shape of our robot using the goals we established. We prototyped mechanisms to get a general idea of the space they would need on the final robot.
Swerve drive
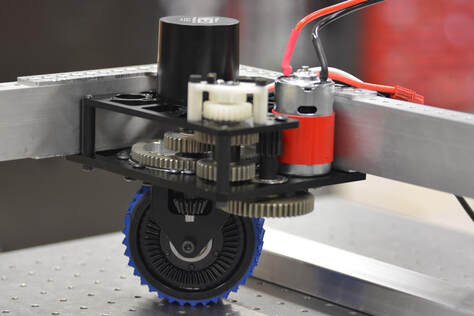
- Following our goal of an agile and maneuverable robot, we decided this was the perfect year to attempt swerve drive for the first time on a competition robot and that it would be the best drivetrain for our strategy and the game.
- It was a huge risk for us, considering the cost and complexity of the system and that before 2019 no current team members had worked with swerve, especially on the software side.
- We held numerous meetings with the entire team to discuss the decision and we also evaluated how confident our software team was in their ability to program the swerve modules.
- In the end, we decided it was a risk we were willing to take because it would be a huge learning experience and it was the perfect year and game to experiment with it. Also, due to the rising popularity of swerve, we were putting our team at a disadvantage by not having worked with it intensively yet. Therefore, we decided that because we had a strong team this year, we would tackle this challenge.
|
|
|
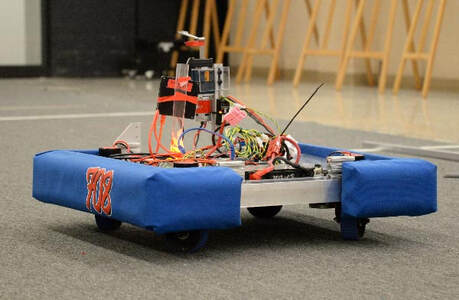
- One thing that made this easier was during the offseason before this year we built a swerve-drive base using the kits we bought. This drive base served to expand our capabilities as a learning experience for team members. Unfortunately, we didn’t have much software time with this during the offseason so we had to write all of the code for the swerve drive during build season. Luckily, the software team had spent the summer reviewing the concept of swerve drive and what was necessary to accomplish this on an FRC robot. In addition, we were able to start writing the code day one of the build season because we already had a swerve drive base.
- In order to write the code, we used a combination of some existing libraries and some home grown software to incorporate the use of new motors, motor controllers, and encoders on each swerve module.
- By the end of build season into our first competition, we had fine-tuned many issues, and during our first competition, there were few problems with it.
Architecture & Packaging
- As a team, we defined what the robot had to do and then we broke up into various subsystem groups, where we figured out how to accomplish these tasks. We initially prototyped every subsystem independently until we had a general idea of their requirements and the space they would take up.
- Knowing the results of prototyping, we had a meeting to lay out where everything could be located on the robot.
- Because we had decided on swerve drive, there would be no defined front, so our intake group wanted to have two intakes each located on the long sides of the robot.
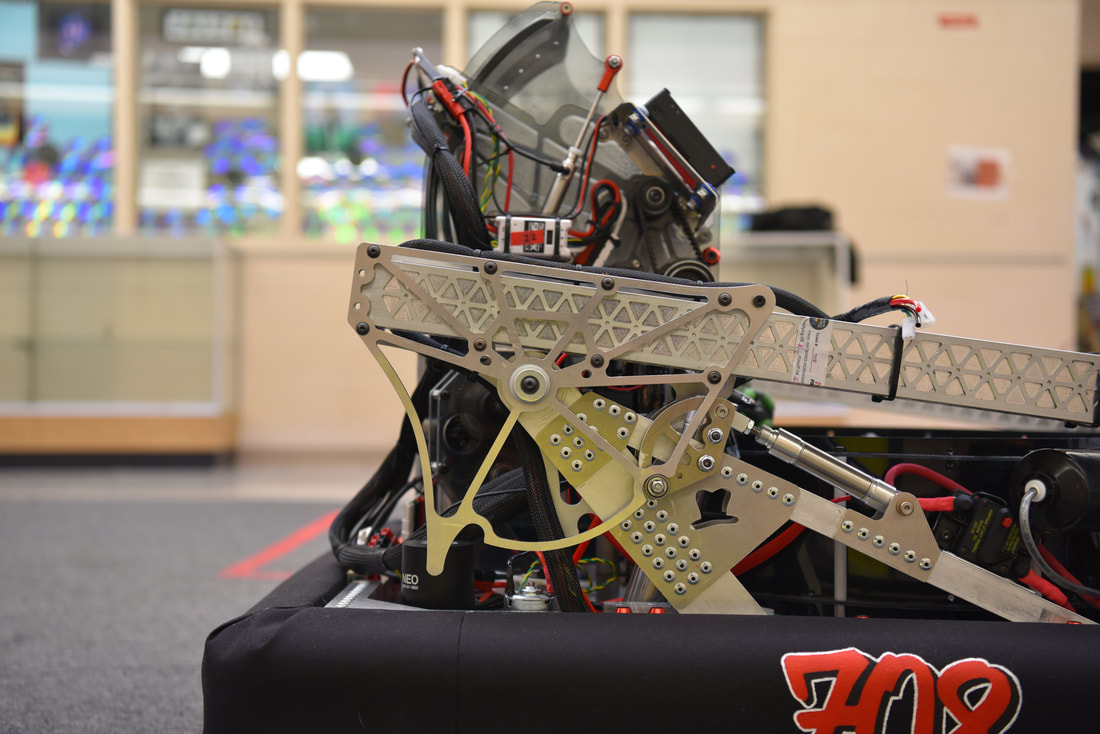
- We knew that the hopper and shooter would need to be centralized which meant we had to have two climbing arms that would wrap around them. This also left limited space for the intake.
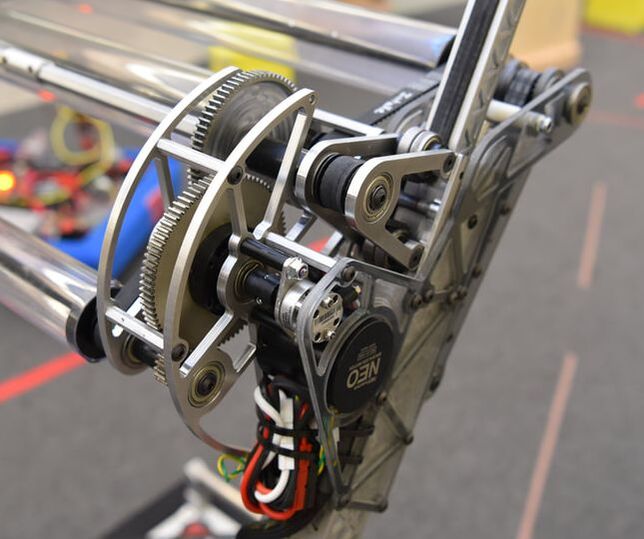
- Due to limited motors and space, we decided to have one intake placed on the end of the arms so we could combine the intake, climber, and color wheel mechanism's motors . This was a compromise to have only one intake on the short side of the robot.
- The mechanical system quickly took up much of the space on the robot leaving limited room for the electronics, compressor, battery, air tanks, etc. This forced us to place the electronics board on the underside of the robot.
out of Motors
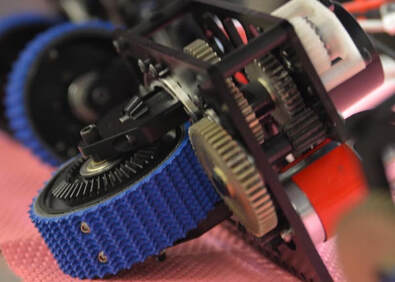
- With 8 motors being used for swerve drive and 1 port used for our limelight, we realized that we cannot have each of the 6 sub-systems use individual motors as we would be over the port limit and potentially could have battery issues.
- Thus, we decided that the only way for us to have all the capabilities that we determined necessary was to either combine systems to use the same motors, or in some cases, use pneumatics in place of motors.
- The area that we determined would be easiest to combine systems was the color wheel and intake. But that was not enough; we were even more ambitious and combined the intake, spinner, and climber into a "PTO style" shifting gearbox that sits at the end of 1 of our arms.
intake, climber, spinner shifting gearbox
|
Climber Strategy
- When we first looked at the climber we made the decision to do a linear extending telescope tube to extend out, reach, and hook onto the bar and then retract to lift the robot.
- We looked at using constant force springs and a winch initially, but once we decided that this would be powered from the top of the arm we decided against this option.
- We then looked at using chain attached to the top and bottom of the inner stage that goes around a sprocket, and when the sprocket spins the tube slides in and out, but the chain was either too weak or too big and heavy.
- This led us to using belt in a similar format which worked extremely well for us in Week 1.
- Because we wanted to reduce the climbing time as much as possible but only had one motor to use, we knew we would have to reduce the friction in the system.
- Thus, we designed and manufactured our own custom bearing blocks to allow for a very stable yet low friction climber that extended to just under the max height of the bar in just a few seconds.
Climber Prototyping
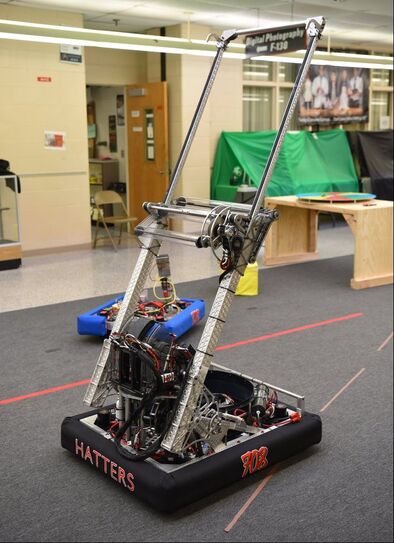
Climber Prototyping:
- In the first couple of days when the climber group met to discuss this years endgame, we looked a lot at the physics of the pendulum and the various heights we would have to reach.
- After discussing the importance of a balanced bar, we started prototyping a mechanism that would allow us to drive on the bar to level the bar.
- While working on this, we investigated how we would be able to reach the bar and pull our robot off the ground. Some of the ideas we explored were a light elevator or scissor lift to attach a hook and then use a winch to lift the robot up. We quickly ruled this out because we knew our robot would swing a lot when climbing, making it hard to balance and we could possibly hit our teammates.
- We then debated between a telescoping arm and a folding mechanism. We decided we would use a telescoping arm because of our experience of using one, and then we debated whether we should have one or two.
- At this point in the season, we knew that the shooter and hopper would occupy the center of the robot and we would have to place the arms on the side, so we choose to do two arms, one on each long side.
|
|
|
- We attempted the same thing using Kevlar or similar cables, but this was also not feasible because the stretch in the ropes could cause the system to rock and damage itself.
- Lastly, we researched if belt would solve the issues we had because it is extremely lightweight yet strong and has relatively little stretch. After significant time spent researching the qualities of belt on manufacturers' websites, we were confident that the belts would work in this use. Thus, we moved forward with developing a final design for this.
Custom Bearing Blocks
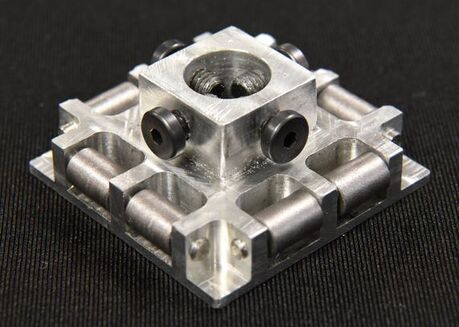
- Another thing special about this years climber is we designed custom bearing blocks that would enable us to reduce the friction in the system and allow us to have a shorter overlap the tubes, yet still maintain the necessary rigidity.
- We normally would have used PTFE sliders to contain the inner tube when traveling, but we decided that we wanted to reduce the climbing time as much as possible. The way we would be able to do this is to have less friction in the entire system so we could lower the gear ratio slightly. This was mostly just optimization of the system to create the most efficient climber we could.
- The initial idea came from doing something similar to what we did for last years' climber and elevator, but transferring it to the inside of a tube. We then looked at other teams' robots for more inspiration to see if anyone else had attempted something similar and how other teams built telescoping arms without PTFE sliders.
- We found some and once we felt confident with what it should look like, we looked into what kind of material we would use for the bearings. We tried to find bearings, but they would not have been strong enough or small enough, so we then looked some more and decided bushings would work well for us.
- Next, we picked tube sizes and designed the bearing blocks to fit in these tubes. We machined and assembled the bearing blocks and tested it, finding that it worked wonderfully.
- One thing we learned from this test was how critical the tolerances in the tube were.
- One thing we did to attempt to mitigate this was when picking what tubes to use, we measured them and used the ones closest to the size we needed.
- The final tubes ending up being too small for the bearing blocks, so we took a dremel to the bushings to take a small amount of material off, and then ran the bearing blocks back and forth through the tube until it was a good fit.
- Overall, the bearing blocks provided a great low friction system that was cheap and provided the strength we needed.
- We made the bearing blocks out of a .75 inch thick, 1.7 by 1.7 inch aluminum block that we then milled to size and shape, and we used a reamer to drill the holes. We then press fit steel dowel pins into the holes and as we put the dowel pins in, we slid brass bushings on. These bushings were what ran on the inside of the outside tube.
|
Intake
|
|
|
Color Wheel Mechanism
- We prototyped many stand-alone options for a color wheel mechanism; however, we determined that it should be integrated into another subsystem to save weight and motors.
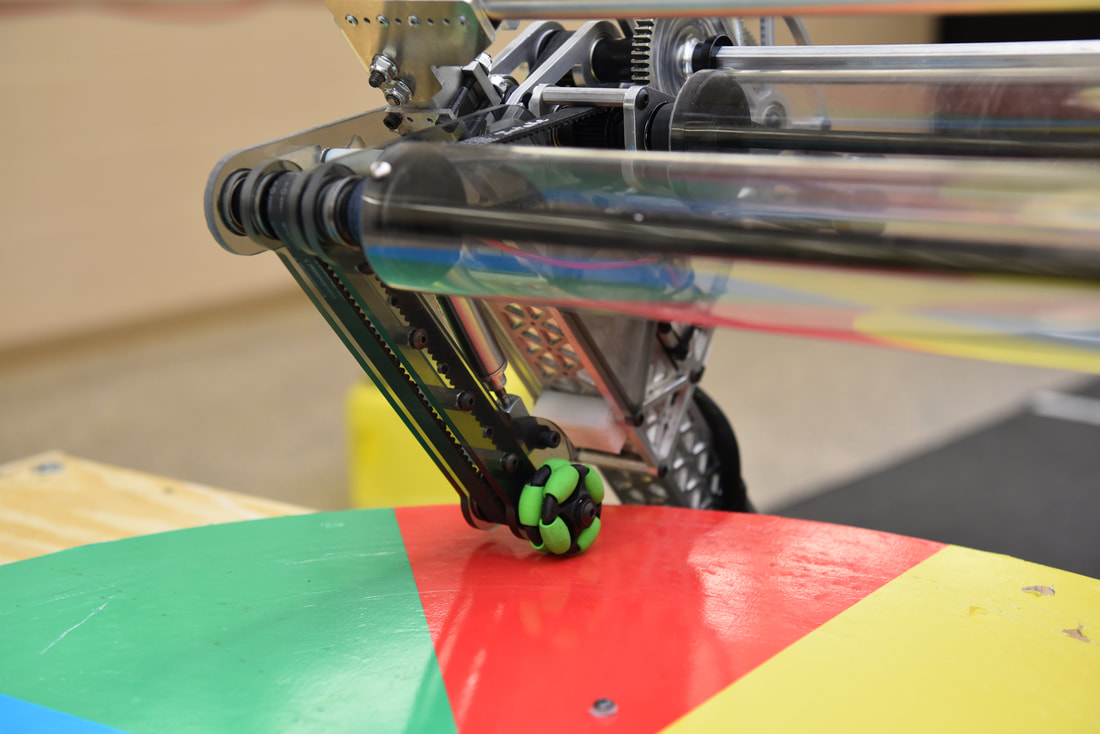
- The architecture of our robot arm provided an intake at the end, which was above the color wheel in the arm pivot's home position. We realized a color wheel mechanism could run off the intake power, be used in the arm's pivot's home position, and be tucked away when not in use.
- This resulted in our "dingus" or color wheel mechanism. The system is pneumatically actuated and has a 1.5" diameter Omni wheel to spin the color wheel.
Arm Pivot
|
Hopper
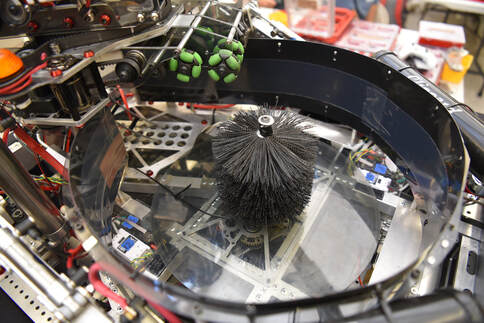
- We went with an open hopper design because we felt that we would be able to intake balls quicker and get them more easily from the loading station. Our prototyping for the rotary style hopper was also more promising than our other methods. This also gave us a large area to intake the power cells and jostle them around to reduce jamming and sticking. The system had a low friction sidewall that allows power cells to slide by as the hopper is rotating. A brush in the center helps separate the power cells and apply a little compression against the hopper wall.
|
|
|
Extractor
- The purpose of the extractor is to remove power cells from the rotary-like hopper and normalize their motion leading into the shooter.
- Normalizing the power cell motion into the turret is critical for consistency. With a turret, we don’t necessarily know the angle of the shooter relative to the extractor at any given time. We needed the balls to feed in with no spin so they contact the wheel the same every time.
- Power cell jamming in the extractor will render the shooter worthless for the entirety of a match, so we had to identify all the potential causes of this. Based on our findings, we added a few design parameters to this system. We geared the roller system so that the power cell accelerated as it passed to each stage of the extractor. Omni wheels remove power cells from the hopper tangent to the sidewall. This allows the cells to roll by when the hopper is spinning but we aren’t shooting.
- The system is powered by a custom gearbox and one neo550 motor.
Shooter Prototyping
|
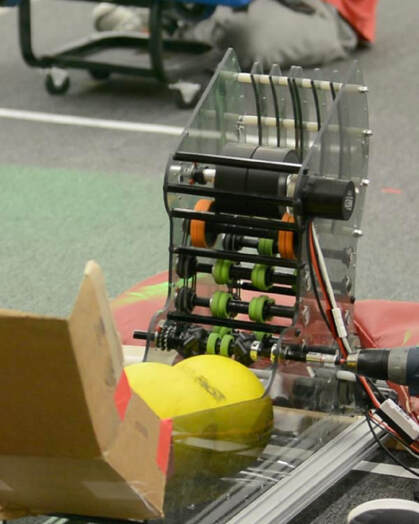
- Up until this point, we were hand feeding balls into the shooter, which we learned led to a very inconsistent shot and it didn’t allow us to properly test the variables we wanted to. In addition, all the prototypes had severe vibration issues, and one thing that helped to improve this was instead of using shaft collars, we used spacers and reduced the acceptable machining tolerances.
- We continued to improve the prototypes and by the third one, we added a simple feeder system to improve consistency. Also, we used sandbags to reduce vibrations and with this prototype, we were confirming our results so far and testing the new feeder system.
- The last prototype was the cleanest prototype and was very similar to the final design on the robot. This prototype included a ramp and feeder system to further improve the consistency and simulate robot performance, and we were easily able to switch the hood. Up until the fourth prototype, we had been using a thin polycarb plate as the backplate that provided the compression, but we realized that this plate flexed every time we shot which made it slightly inconsistent. To fix this, we instead used numerous smaller polycarb plates stacked side by side to make the hood more rigid.
- With this prototype, we tested the new feeder system and the hood length and angle. Once we refined the prototype, we used it to obtain some initial data for software.
- Throughout our prototyping, we realized the importance of a consistent feeder system and minimal vibrations because they accounted for a lot of variability in the shots.
Shooter
|
|
|
|
- The turret could rotate 1.5 rotations and then spin all the way around to the other side when it reached its maximum rotation. The turret was also custom designed and made in house on our CNC.
- We used a wiring sleeving to help reduce the tangling of wires and keep the wires organized and out of the way.
- We had some issues with the bag motor that powered the turret because it kept overheating and getting burnt. To fix this, we changed the motor to a 775 Pro and limited the amperage draw.
Software
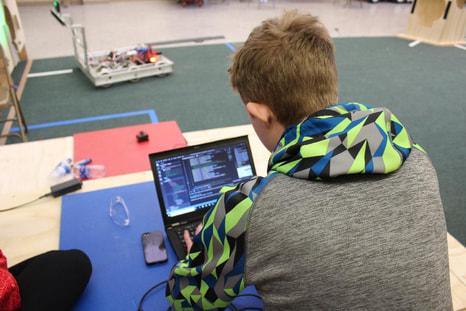
- To ensure that our robot was agile and maneuvered the field with ease, we decided that a field centric swerve drive using a gyro best suited our needs. Due to having limited swerve drive experience prior to the season, we referenced code posted by many other teams to create our swerve code baseline.
- Getting swerve to work was an interactive process that involved a lot of code review, time, and testing. We used our swerve drive base that was built over the summer to iterate through all of our code until we were confident in what we had, knowing that we would continue to tune the code for our final drive base.
- After getting our field centric drive base working, we then took the same base idea to program our turret. We wanted to ensure that the robot always knew where the target was using vision tracking, the field orientation, and the position of the turret with respect to the robot.
- Using vision tracking with a limelight locking on to the retroreflective tape around the goal, our targeting system calculates the distance from the goal to adjust the hood position and the speed of the flywheel. In conjunction with the automatic maneuverability of the turret, this made targeting fully autonomous.
- Due to the limited availability of motor and sensor ports from the swerve drive, we had to combine systems meaning using fewer sensors to control the remaining systems. We used encoders to determine the spinner revolutions and climber extension and retraction to avoid the use of extra sensors. The spinner automatically stops after a certain number of encoder counts, which we calculated to be just over three complete rotations of the control panel for rotation control. By pressing a button on the controller, it will also rotate the color wheel a set number of encoder counts, moving the wheel one color over. The button can be continually pressed so the desired color is matched up for position control.
- We have several autonomous routines that run successfully. Our starting position on the field and our role for a match determines which routine we run. Our eight-ball autonomous is one that we are most proud of. Starting with 3 power cells, the robot moves from the initiation line to pick up 2 more and shoots all 5 into the goal. The robot then goes to pick up the 3 balls along the boundary of the rendezvous point, with the shooter constantly tracking the goal, and shoots them.
Coping with Obesity
- After we completed our robot, we realized that it was approximately 12 pounds overweight.
- We combed through every single part of the robot, analyzing them to see if we could save or remove weight anywhere.
- Numerous plates and tubes were lightening-patterned on the CNC router, many parts were swapped out for lighter variants, and some mechanisms, like the combined climber and intake gearbox, had two motors but we dropped one. Also, we were more aggressive with pocketing.
- By competition, we were successfully under the weight limit, allowing us to compete.
- After HH, we lightened the intake by about 2 pounds and solved some jamming issues. Furthermore, the competition sparked other ideas about how to fix the robot for future competitions.
